Create multiple windows in VisionOS
We will be creating multiple windows in VisionOS using the WindowGroup scene. WindowGroup allows you to present a group of identical structured windows, meaning every window in the group maintain independent state. For more about WindowGroup see SwiftUI WindowGroup
Our final product
Step-by-Step
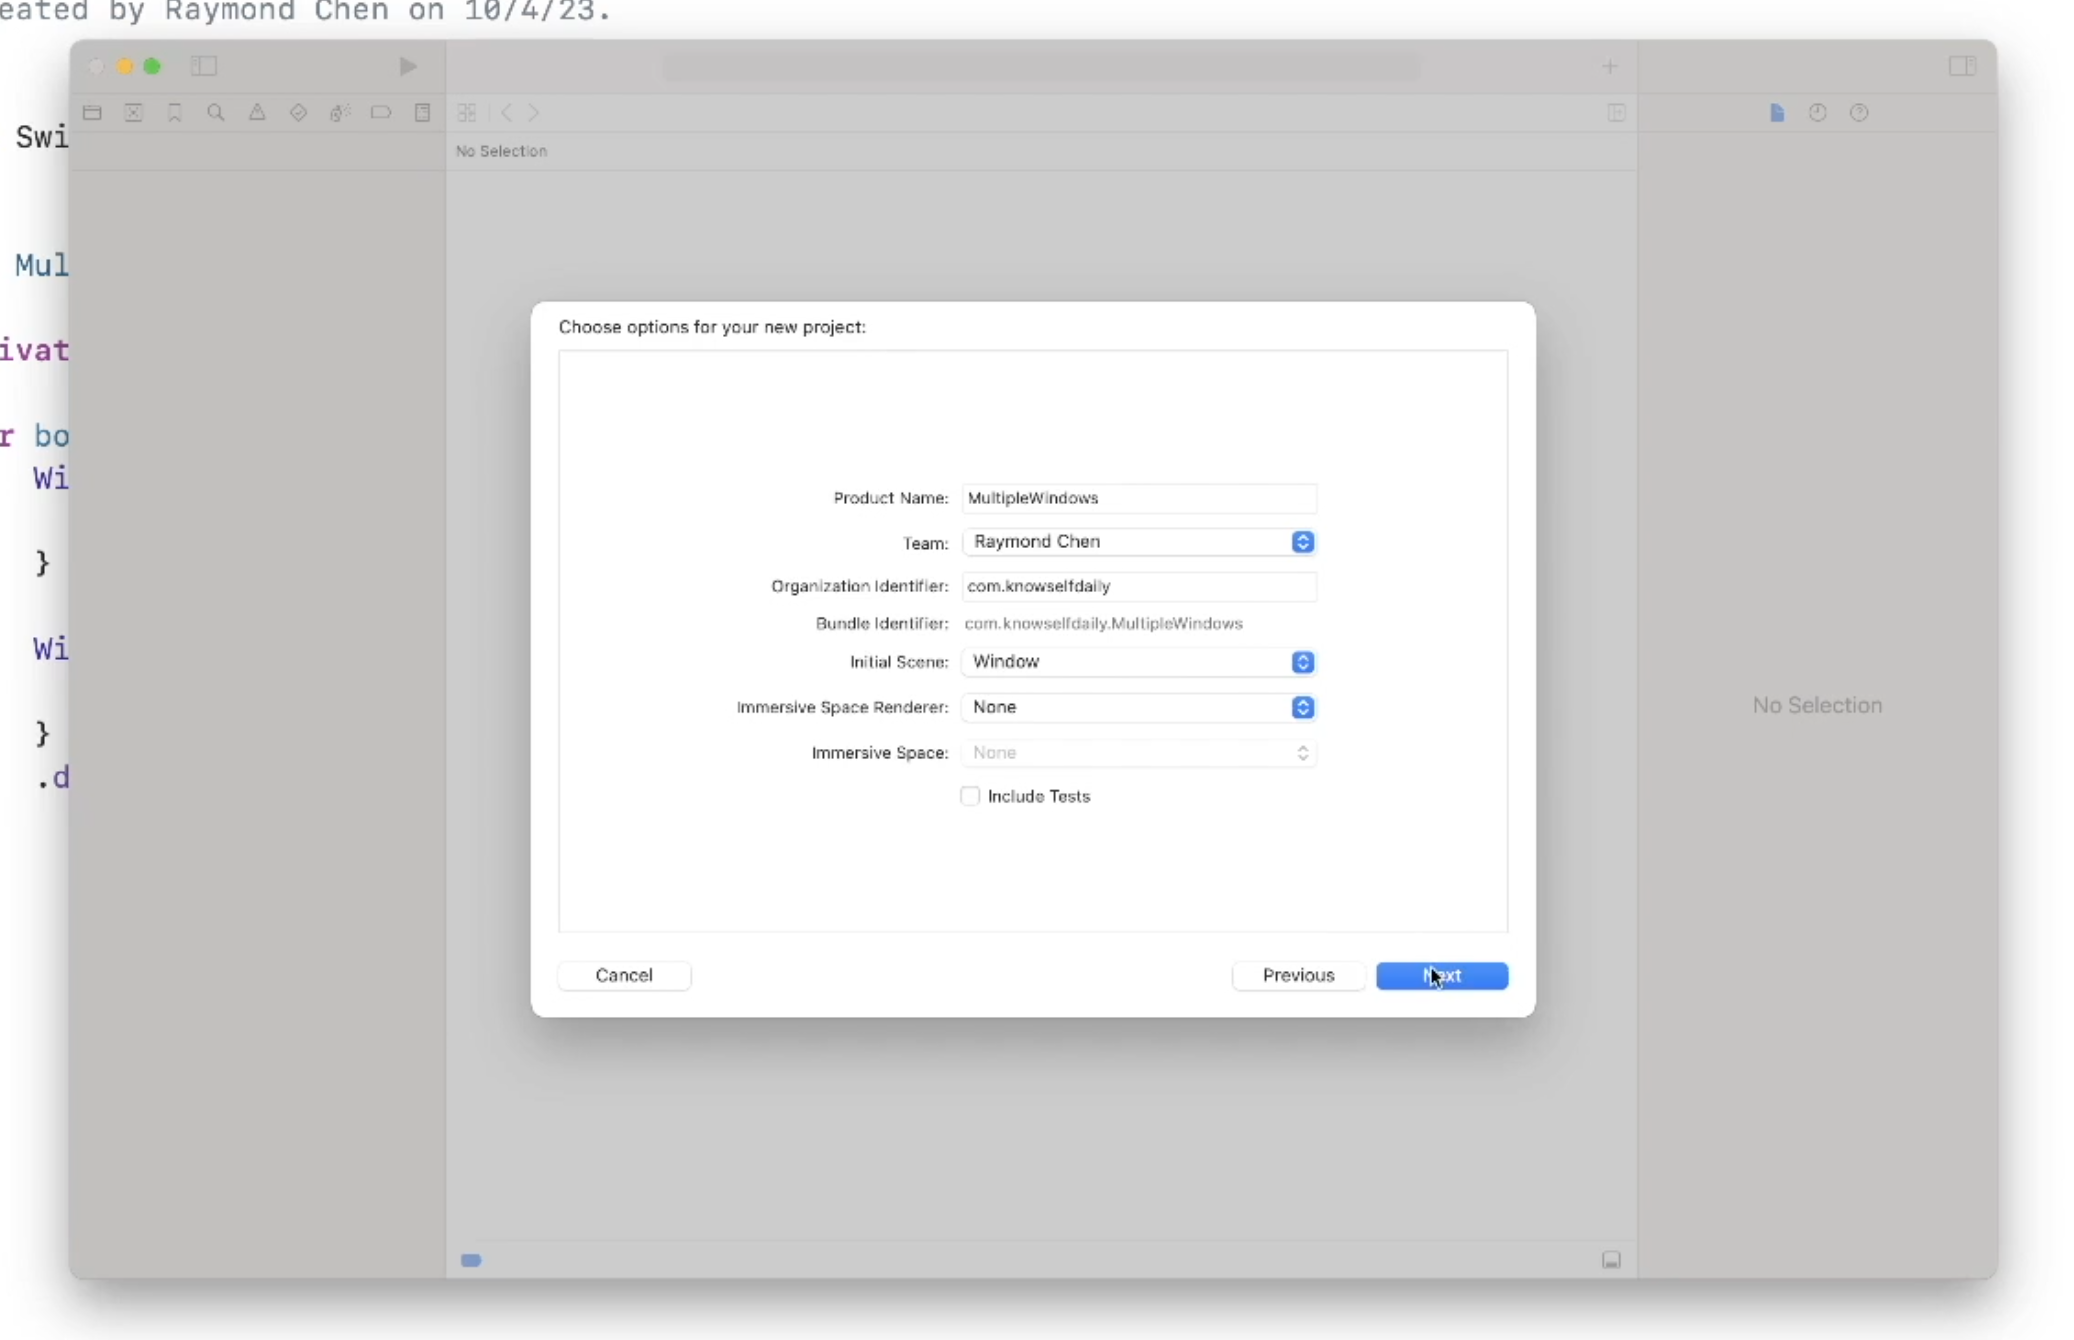
Open Xcode and Create a Project
Create ColorString Model to store data for new windows
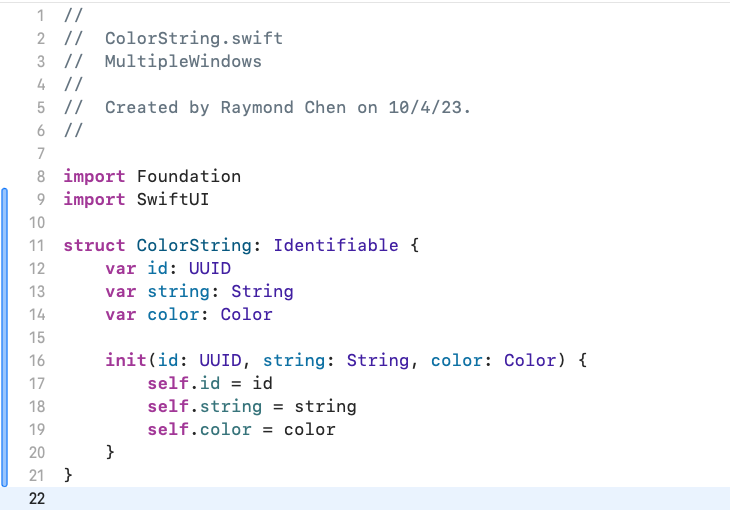
- line 9 - Import SwiftUI to get access to the struct Color, you will be storing Color into your ColorString object
- line 11 - Conform the ColorString struct to the Identifiable protocol, you will be needing this to allow an array of ColorString to use id for subscript
- line 12 - In order to conform to the Identifiable protocol add an id variable of type UUID
- line 13, 14 - Add string and color vars of String and Color type respectively. We will need those to populate our views with a String and Color.
- line 16 - Create an init function to initialize the struct with the respective variables.
Create ColorString ViewModel to present consistant data
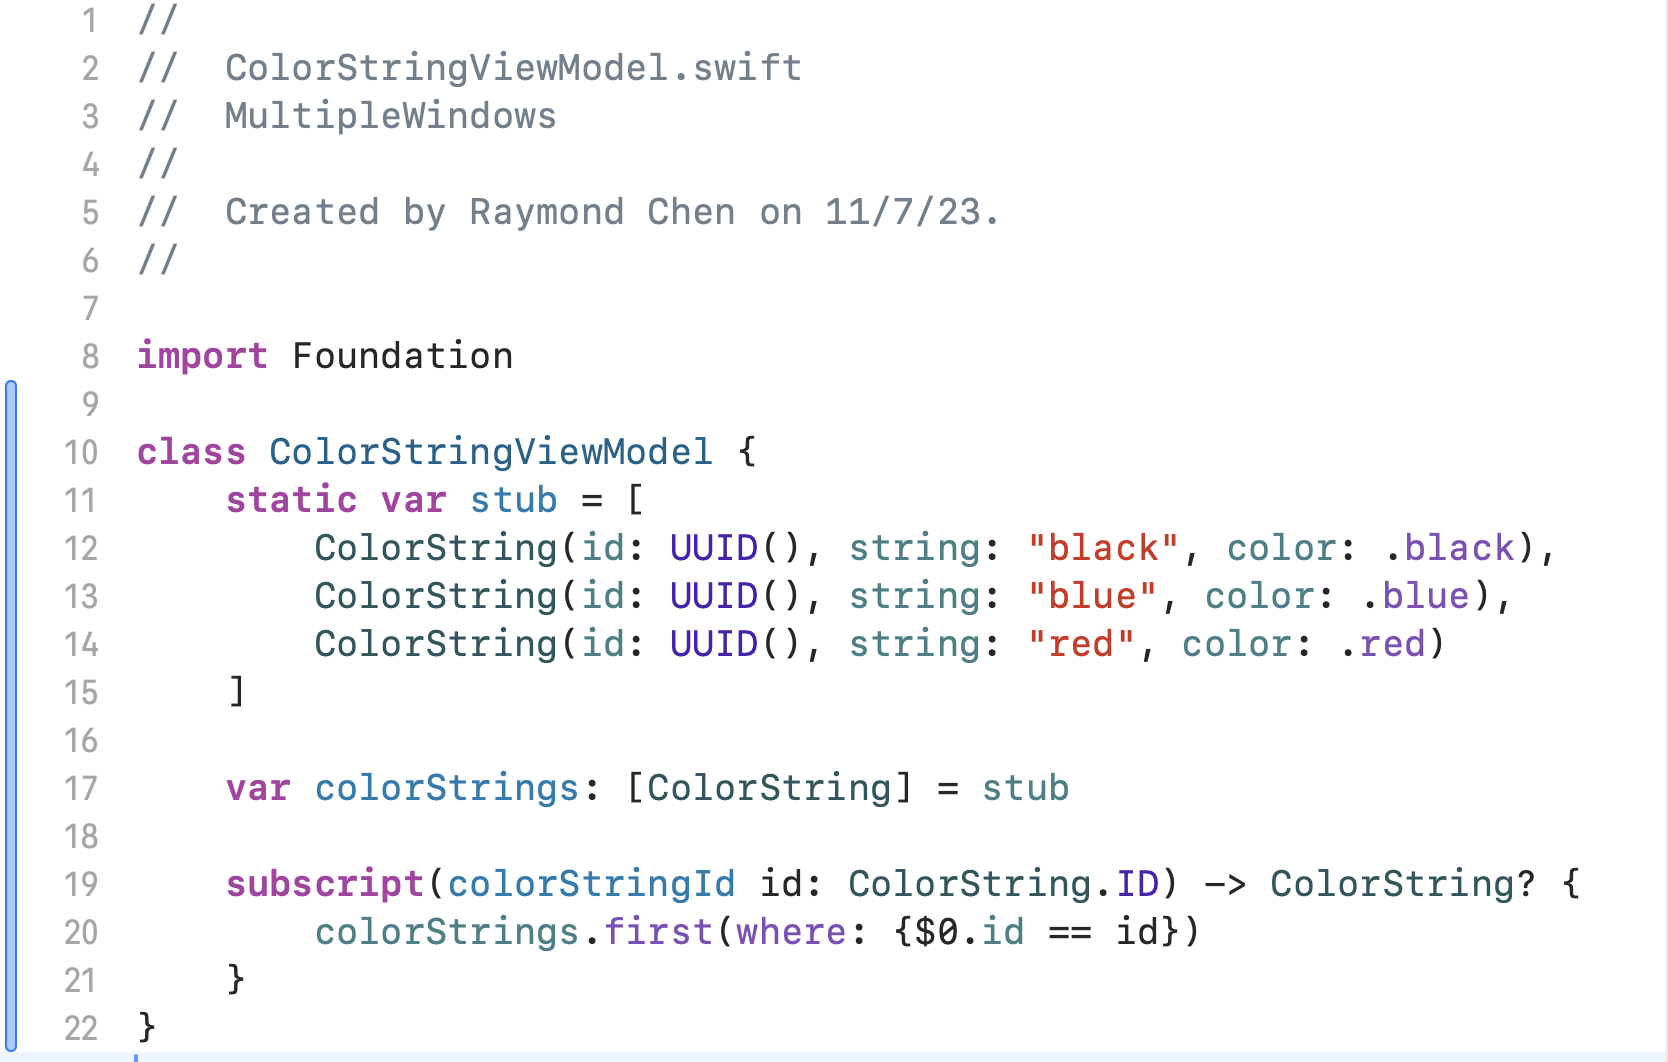
- line 11 - Create a static var stub to hard code data for viewModel. It is generally used for previews.
- line 17 - Populate viewModel with stub data
- line 19 - Create a custom subscript to retrieve values in the viewModel.
Create ColorListView to present the ViewModel data
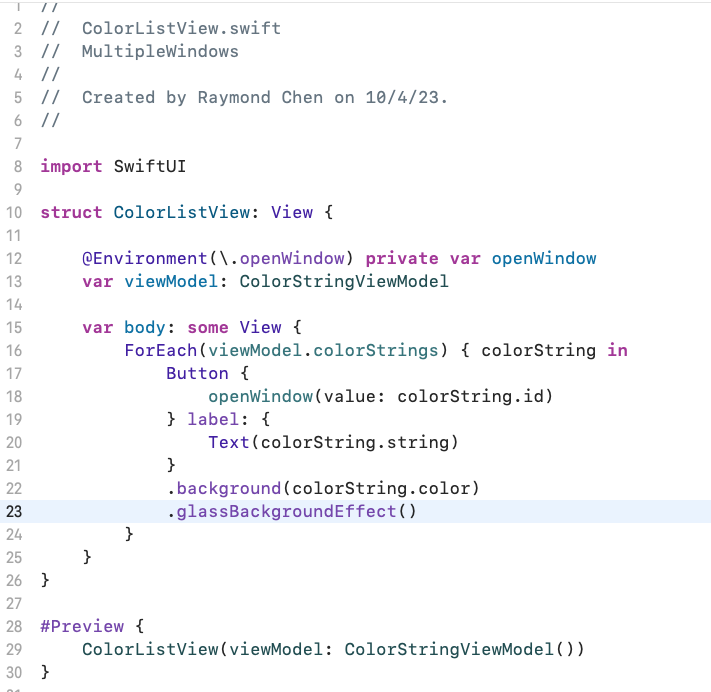
- line 12 - Get the openWindow from the view environment using the keypath \.openWindow. We will be using this to open up new windows
- line 16 - Create a ForEach loop to create the desired buttons needed to open new windows
- line 17 - Set the action of the button to open new window of colorString.id
- line 19 - Label the button with colorString.string
- line 22 - Set the background to colorString.color
- line 23 - Add glass background effect
Update MultipleWindowsApp
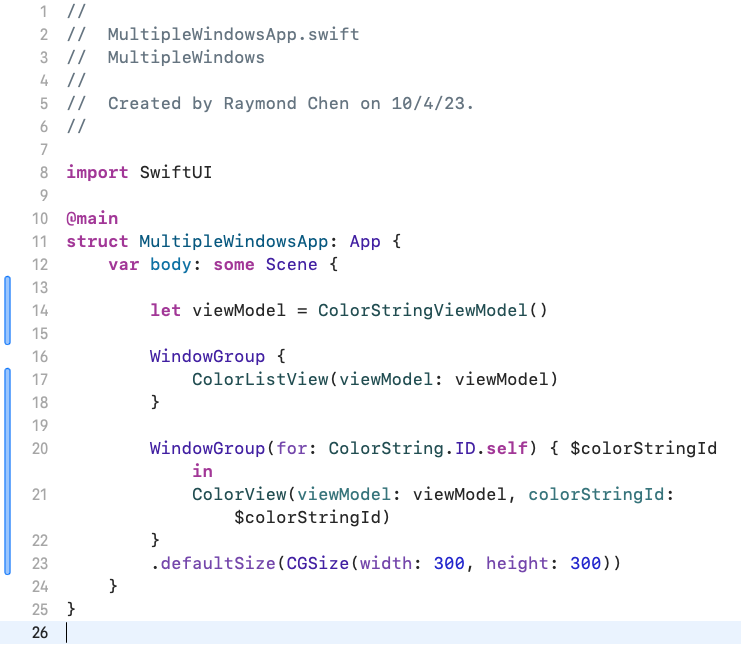
- line 12 - Get ColorStringViewModel as source of truth
- line 16 - Create main WindowGroup to display ColorListView on launching app
- line 20 - Create sub WindowGroups to display each colorString in ColorView
- line 23 - Set the default size of the Window
Create ColorView to present the ViewModel data
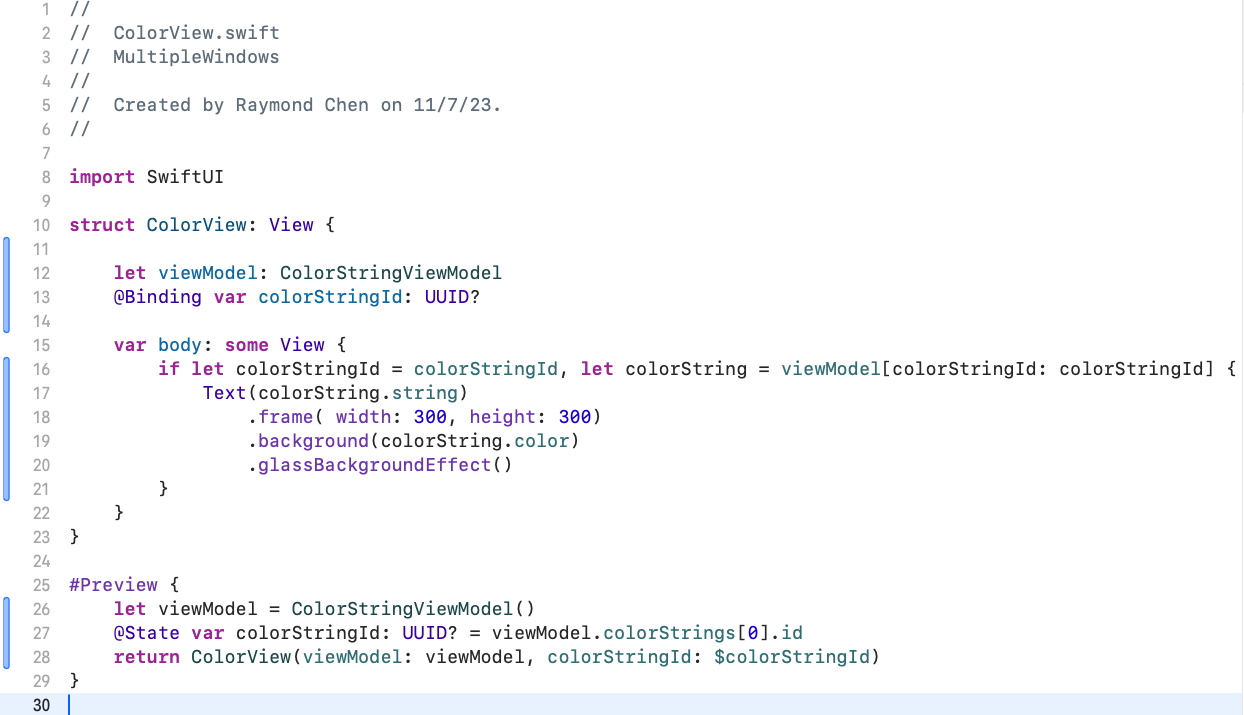
- line 12 - Get ColorStringViewModel as source of truth
- line 13 - Get Binding variable colorStringId from WindowGroup as source of truth
- line 16 - If there is a colorStringId, get the colorString and we can create the ColorView
- line 17 - Instantiate the Text View with colorString.string
- line 18 - Give the Text View a Frame of 300 by 300
- line 19 - Give the Frame a background style with the colorString.color
- line 20 - Enhance the color with glassBackgroundEffect()
Update InfoPList
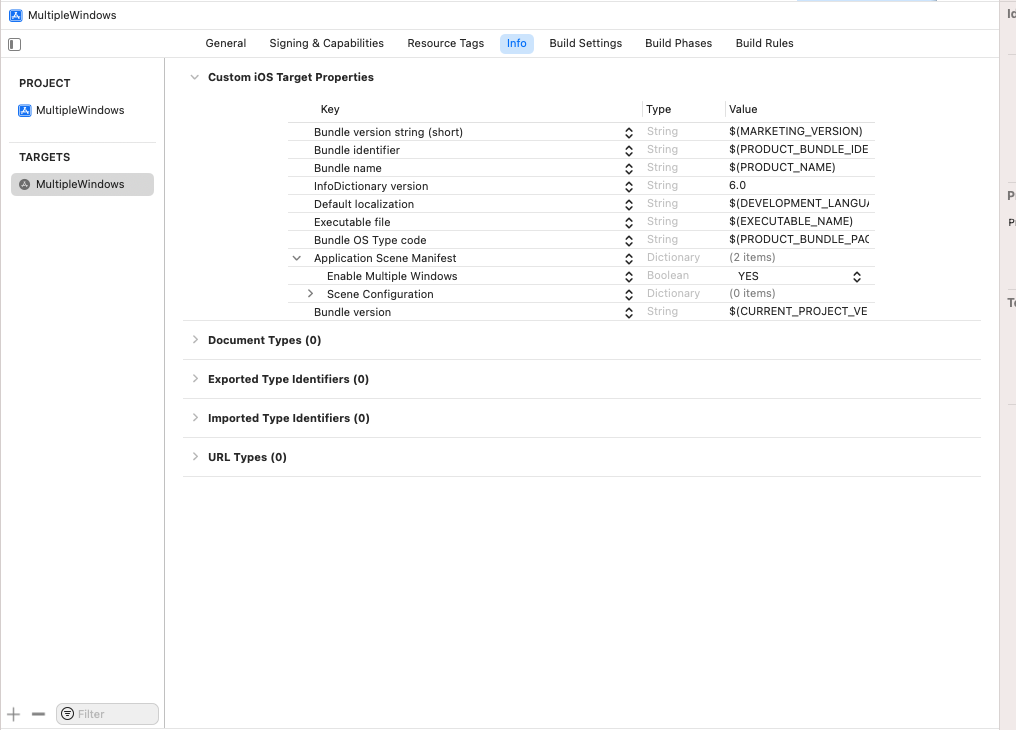
- Under Application Scene Manifest, Change the boolean value of Enable Multiple Windows to YES.
Run the app!
For more details see the video
Related Articles
WindowGroup SwiftUI WindowGroup
Scene, see Apple tutorial Specifying the view hierarchy of an app using a scene
Notes mentioning this note
VisionOS Basic Tutorials
[[Create multiple windows in VisionOS]]
[[Tap and Drag Spatial Gesture in VisionOS]]